

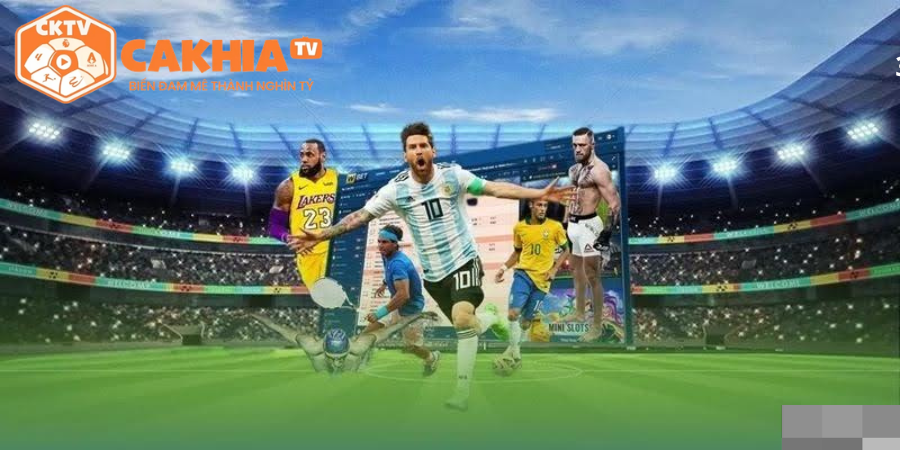
CakhiaTV - Trực Tiếp Bóng Đá HD, Xem TTBD Bóng Đá Miễn Phí
CakhiaTV là nền tảng trực tiếp bóng đá miễn phí mang đến trải nghiệm xem bóng đá HD mượt mà với hình ảnh sắc nét và âm thanh sống động. Người hâm mộ có thể dễ dàng theo dõi các trận đấu hấp dẫn, cập nhật TTBD nhanh chóng cùng nhiều link xem ổn định từ những giải đấu hàng đầu thế giới.
Giới thiệu trang bóng đá trực tuyến CakhiaTV
CakhiaTV là nền tảng xem bóng đá trực tuyến hàng đầu tại Việt Nam, cung cấp link xem miễn phí các trận đấu trong nước và quốc tế. Website nổi bật với đường truyền ổn định, hình ảnh sắc nét và cập nhật link nhanh chóng. Người dùng có thể theo dõi nhiều giải đấu lớn như Premier League, Champions League, World Cup hay V-League mỗi ngày. Nhờ trải nghiệm mượt mà và nội dung đa dạng, CakhiaTV trở thành lựa chọn quen thuộc của người hâm mộ bóng đá.
CakhiaTV hướng đến cộng đồng người dùng đa dạng, đặc biệt là những người đam mê bóng đá và muốn theo dõi các trận đấu một cách tiện lợi. Nền tảng không chỉ đáp ứng nhu cầu giải trí mà còn cho phép cập nhật tin tức nhanh chóng, xem highlight sau trận và phân tích kết quả chi tiết, giúp người xem dễ dàng nắm bắt mọi diễn biến quan trọng. Với hàng triệu lượt truy cập mỗi tháng, CakhiaTV đang khẳng định sức hút mạnh mẽ và vị thế vững chắc trong cộng đồng yêu bóng đá tại Việt Nam.
Bên cạnh đó, CakhiaTV còn được đánh giá là nguồn thông tin đáng tin cậy nhờ hệ thống cập nhật kết quả chính xác và thống kê đầy đủ theo thời gian thực. Người dùng có thể theo dõi phong độ đội bóng, diễn biến trận đấu cũng như các số liệu quan trọng để hiểu rõ hơn về từng cuộc đối đầu. Sự kết hợp giữa trải nghiệm giải trí và giá trị thông tin đã giúp CakhiaTV trở thành địa chỉ quen thuộc, nơi người dùng vừa theo dõi trận đấu vừa nâng cao kiến thức bóng đá.
Những hạng mục CakhiaTV đang sở hữu
Xem bóng đá trực tiếp đa dạng giải đấu miễn phí Full HD
Một trong những điểm mạnh nổi bật của CakhiaTV là cung cấp dịch vụ xem bóng đá trực tiếp hoàn toàn miễn phí với chất lượng Full HD sắc nét. Nhờ đường truyền ổn định, tốc độ mượt mà, người hâm mộ có thể tận hưởng trọn vẹn từng pha bóng kịch tính như đang theo dõi tại sân vận động.
Trực tiếp Ngoại Hạng Anh hấp dẫn
Ngoại Hạng Anh luôn nằm trong danh sách giải đấu được quan tâm nhiều nhất. Đây là sân chơi của những đội bóng hàng đầu như MU, Liverpool, Man City, Chelsea hay Arsenal. Trên CakhiaTV, người xem có thể theo dõi đầy đủ các trận đấu đỉnh cao cùng những màn trình diễn mãn nhãn và cuộc đua vô địch đầy kịch tính.
Xem La Liga trực tiếp tại CakhiaTV
La Liga thu hút người hâm mộ bởi lối chơi kỹ thuật và giàu tính sáng tạo. Những trận El Clasico giữa Real Madrid và Barcelona luôn là tâm điểm. CakhiaTV mang đến link xem ổn định giúp bạn không bỏ lỡ những khoảnh khắc đẳng cấp của các ngôi sao hàng đầu.
Bundesliga – Bóng đá tốc độ và sức mạnh
Giải VĐQG Đức nổi tiếng với lối chơi nhanh, giàu thể lực cùng bầu không khí cuồng nhiệt trên khán đài. Những đội bóng như Bayern Munich hay Dortmund luôn mang đến các trận cầu hấp dẫn, và tất cả đều được cập nhật đầy đủ trên CakhiaTV.
UEFA Champions League – Đỉnh cao châu Âu
Champions League là giải đấu danh giá nhất cấp CLB tại châu Âu. CakhiaTV phát sóng từ vòng bảng đến chung kết, giúp người xem theo dõi hành trình chinh phục ngôi vương của các đội bóng lớn với chất lượng cao và link xem ổn định.
Serie A – Sức hút từ bóng đá Ý
Serie A mang đến những trận đấu giàu chiến thuật và đầy tính cạnh tranh. Tại CakhiaTV, người dùng không chỉ xem trực tiếp mà còn có thể cập nhật lịch thi đấu, bảng xếp hạng và tin tức xoay quanh các CLB hàng đầu nước Ý.
Trực tiếp World Cup đầy đủ
World Cup là sự kiện bóng đá lớn nhất hành tinh, nơi hội tụ các đội tuyển quốc gia mạnh nhất. CakhiaTV cung cấp link xem toàn bộ các trận đấu, đồng thời cập nhật nhanh chóng thông tin về kết quả, lịch thi đấu và diễn biến giải đấu.
AFF Cup – Sôi động khu vực Đông Nam Á
Giải đấu AFF Cup luôn nhận được sự quan tâm lớn từ người hâm mộ Việt Nam. CakhiaTV phát sóng đầy đủ các trận đấu, giúp người xem theo dõi hành trình của các đội tuyển trong khu vực một cách thuận tiện.
Nhiều giải đấu hấp dẫn khác
Ngoài các giải lớn, CakhiaTV còn cung cấp nhiều giải đấu quốc tế và khu vực như Ligue 1, MLS, Eredivisie, Primeira Liga hay Copa Libertadores. Nhờ đó, người xem có thêm nhiều lựa chọn để khám phá bóng đá toàn cầu.
Xem bóng rổ và các môn thể thao khác
Không chỉ dừng lại ở bóng đá, CakhiaTV còn phát sóng các giải bóng rổ như NBA, EuroLeague cùng nhiều môn thể thao khác như tennis, đua xe F1, MotoGP hay golf. Điều này giúp nền tảng trở thành điểm đến giải trí thể thao toàn diện.
Cập nhật lịch thi đấu nhanh chóng
CakhiaTV cập nhật lịch thi đấu bóng đá mỗi ngày với thông tin nhanh chóng và chính xác, giúp người xem dễ dàng nắm bắt thời gian diễn ra các trận cầu hấp dẫn. Nhờ đó, người hâm mộ có thể chủ động sắp xếp thời gian và không bỏ lỡ những trận đấu quan trọng yêu thích.
Tra cứu kết quả bóng đá tiện lợi
Người dùng có thể dễ dàng tra cứu kết quả bóng đá ngay sau khi trận đấu kết thúc với thông tin được cập nhật nhanh và đầy đủ. Chỉ với vài thao tác đơn giản, bạn đã có thể theo dõi tỷ số, cầu thủ ghi bàn cùng những diễn biến nổi bật của trận đấu.
Nhận định và phân tích chuyên sâu
Bình luận viên – Điểm nhấn đặc biệt
Một trong những điểm nổi bật giúp CakhiaTV thu hút đông đảo người xem chính là đội ngũ bình luận viên có phong cách riêng, hài hước và gần gũi. Không chỉ mang đến những phân tích chuyên môn dễ hiểu, các bình luận viên còn tạo bầu không khí sôi động với cách dẫn dắt tự nhiên và đầy cảm xúc. Sự kết hợp giữa kiến thức bóng đá và yếu tố giải trí giúp mỗi trận đấu trở nên hấp dẫn hơn, mang lại trải nghiệm xem bóng đá thú vị và khác biệt cho người hâm mộ.
Những kênh xem bóng đá trực tiếp đáng chú ý khác
Bên cạnh CakhiaTV, người hâm mộ còn có nhiều lựa chọn hấp dẫn khác để theo dõi các trận cầu đỉnh cao. Những nền tảng này mang đến trải nghiệm đa dạng về nội dung, chất lượng hình ảnh và độ ổn định, đáp ứng nhu cầu xem bóng đá ngày càng cao.
VTV3 – Kênh truyền hình quen thuộc
VTV6 thuộc Đài Truyền hình Việt Nam, là lựa chọn phổ biến để theo dõi các trận đấu của đội tuyển quốc gia và nhiều giải đấu quốc tế. Ngoài phát sóng trực tiếp, kênh còn có các chương trình phân tích, bình luận giúp khán giả hiểu rõ hơn về diễn biến trận đấu.
F.P.T Play – Nền tảng xem bóng đá trực tuyến
FPT Play cung cấp dịch vụ xem bóng đá trực tuyến với kho nội dung phong phú. Người dùng có thể theo dõi nhiều giải đấu trong và ngoài nước, đồng thời sử dụng các tiện ích như xem lại, cập nhật tin tức và tương tác cùng cộng đồng.
Rakhoi TV – Cập nhật nhanh và đầy đủ
RakhoiTV không chỉ phát sóng trực tiếp mà còn cung cấp thông tin bóng đá như kết quả, lịch thi đấu và tin tức cầu thủ. Đây là điểm đến phù hợp cho những ai muốn vừa xem vừa cập nhật tình hình bóng đá mới nhất.
Mitom TV – Giao diện thân thiện
Mitom mang đến trải nghiệm đơn giản, dễ sử dụng với tốc độ cập nhật nhanh. Ngoài việc phát trực tiếp các trận đấu, nền tảng này còn cung cấp bảng xếp hạng, lịch thi đấu và tin tức liên quan.
Xoilac – Kênh quen thuộc của người hâm mộ
Xoilac là cái tên quen thuộc trong cộng đồng yêu bóng đá với khả năng phát sóng đa dạng các giải đấu lớn nhỏ. Hình ảnh rõ nét, đường truyền ổn định là điểm mạnh giúp nền tảng này được nhiều người lựa chọn.
Vebo TV – Lựa chọn mới nổi
Dù xuất hiện chưa lâu, Vebo TV đã nhanh chóng thu hút người dùng nhờ tốc độ truy cập nhanh và nội dung phong phú. Kênh cung cấp nhiều trận đấu hấp dẫn, phù hợp với nhu cầu theo dõi bóng đá thường xuyên.
Xoivotv – Kết nối cộng đồng bóng đá
Xoivotv không chỉ phát trực tiếp mà còn là nơi chia sẻ thông tin, bình luận và phân tích chuyên sâu. Đây cũng là không gian để người hâm mộ giao lưu, thảo luận và cùng nhau tận hưởng những trận đấu kịch tính.
Nhận xét, đánh giá thực tế về CakhiaTV từ khách hàng
Giữa hàng trăm website bóng đá khác, CakhiaTV vẫn giữ vững vị thế top 1 nhờ hàng loạt ưu điểm nổi bật. Dưới đây là đánh giá tổng quan về những điểm mạnh khiến kênh này luôn được cộng đồng yêu thích. Dưới đây là bảng đánh giá chi tiết các ưu điểm của CakhiaTV, giúp bạn thấy rõ lý do kênh này luôn dẫn đầu thị phần:
| Ưu điểm | Mô tả chi tiết | Lợi ích cho người dùng |
| Link xem trực tiếp đa dạng | Kênh CakhiaTV cung cấp nhiều link chất lượng cao từ các nguồn uy tín, hỗ trợ xem HD/Full HD trên mọi thiết bị mà không giật lag, ngay cả khi lượng người xem đông. | Giúp hội viên CakhiaTV theo dõi trận đấu mượt mà, tránh tình trạng quá tải hoặc link chết đột ngột. |
| Thông tin phong phú, đa dạng | Cập nhật đầy đủ kết quả, lịch thi đấu, BXH, tin tức bóng đá từ các giải lớn nhỏ, kèm video highlight và phân tích chuyên sâu. | Khách hàng có thể nắm bắt mọi khía cạnh bóng đá chỉ tại một nơi, tiết kiệm thời gian tìm kiếm. |
| Hoàn toàn miễn phí, không đăng ký | Không yêu cầu nạp phí hay tạo tài khoản để xem link, đọc tin tức hoặc tra cứu dữ liệu. | Thành viên dễ dàng truy cập mà không gặp rào cản, phù hợp với mọi đối tượng từ fan casual đến chuyên nghiệp. |
| Giao diện đẹp, dễ sử dụng | Thiết kế hiện đại, màu sắc hài hòa, tin bài hiển thị rõ ràng với kích cỡ chữ lớn, thao tác đơn giản trên cả mobile và PC. | Bạn có thể tìm thông tin nhanh chóng, trải nghiệm thoải mái mà không bị rối mắt. |
| Nội dung chính xác, đáng tin cậy | Tin tức và dữ liệu CakhiaTV luôn dựa trên nguồn uy tín, không giật tít câu view hay đăng thông tin giả mạo. | Hội viên yên tâm sử dụng để theo dõi hoặc soi kèo, tránh bị lừa bởi fake news. |
| Nhận định, soi kèo từ chuyên gia | Đội ngũ chuyên gia am hiểu bóng đá và cá cược, cung cấp phân tích trận đấu, soi kèo châu Á/Âu, tài xỉu chuẩn xác. | Nhân viên CakhiaTV hỗ trợ tay cá cược đưa ra quyết định thông minh, tăng tỷ lệ thắng lớn. |
| Bảo mật thông tin người dùng | CakhiaTV không thu thập dữ liệu cá nhân, lịch sử truy cập được bảo vệ, không rò rỉ ra ngoài. | Khách hàng an tâm lướt web CakhiaTV mà không lo bị theo dõi hoặc tấn công mạng. |
⇒ Những ưu điểm trên đã giúp CakhiaTV vượt trội so với đối thủ, mang lại giá trị thực sự cho người dùng. Hội viên không chỉ xem bóng đá mà còn thu thập dữ liệu hữu ích cho đam mê cá nhân.
Trang web bóng đá CakhiaTV đáp ứng những chức năng nào?
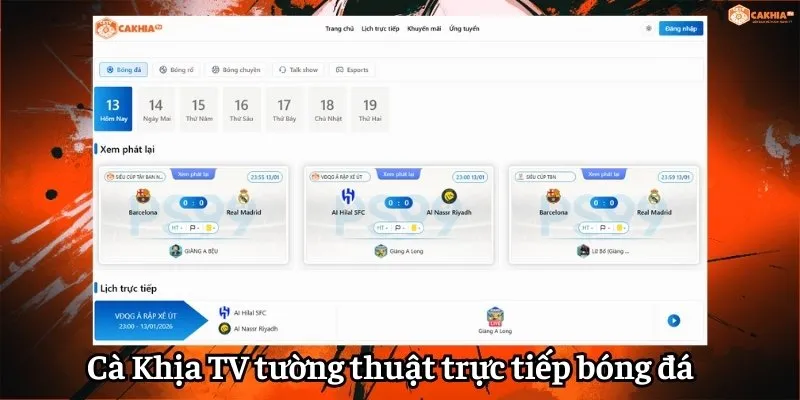
Chức năng tường thuật trực tiếp bóng đá CakhiaTV
Không chỉ đơn thuần là một website phát sóng trực tiếp, CakhiaTV còn được xem như một nền tảng đa tiện ích dành riêng cho người yêu bóng đá. Tại đây, người dùng có thể theo dõi các trận đấu với chất lượng ổn định, tốc độ tải nhanh và hạn chế tối đa tình trạng giật lag.
Bên cạnh đó, CakhiaTV còn tích hợp nhiều tính năng hữu ích như cập nhật lịch thi đấu, kết quả trận đấu, bảng xếp hạng và thông tin trước – sau trận. Hệ thống link xem được cập nhật liên tục, giúp người xem dễ dàng truy cập vào các trận cầu hấp dẫn từ nhiều giải đấu lớn nhỏ trên thế giới.
Đặc biệt, nền tảng còn hỗ trợ bình luận trực tiếp, tạo không gian tương tác sôi động giữa người hâm mộ, mang đến trải nghiệm xem bóng đá không chỉ đầy đủ mà còn thú vị hơn.

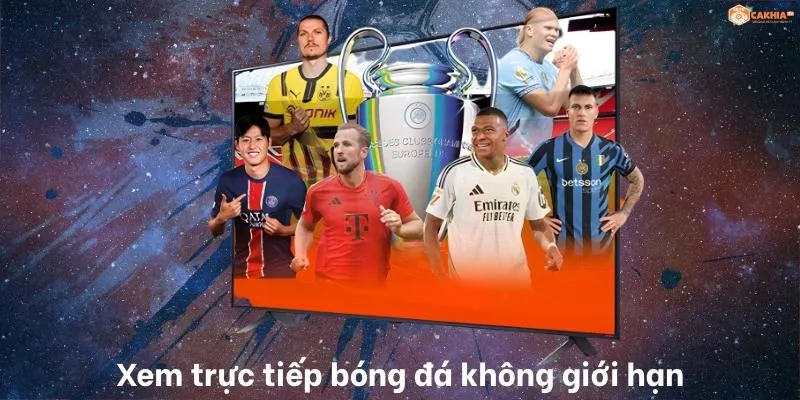
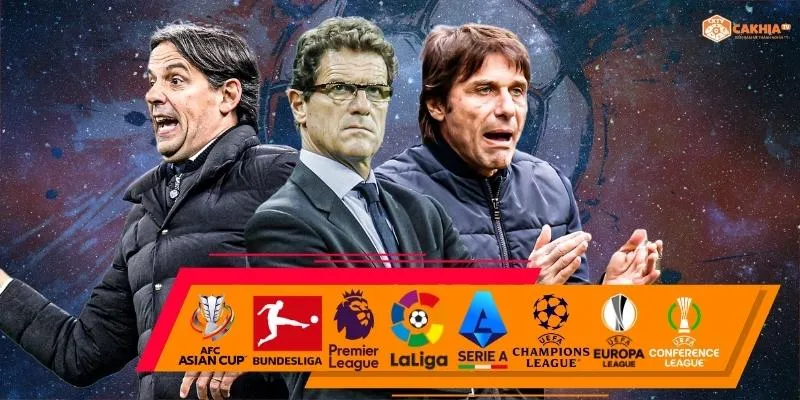
Các giải đấu nào có trên CakhiaTV?
CakhiaTV mang đến hệ thống giải đấu đa dạng, đáp ứng mọi nhu cầu của người hâm mộ bóng đá. Không chỉ dừng lại ở những giải đấu hàng đầu, nền tảng còn mở rộng phạm vi phủ sóng tới hàng trăm giải lớn nhỏ trên toàn thế giới.
Người xem có thể dễ dàng theo dõi các giải đấu đỉnh cao như Ngoại Hạng Anh, Champions League, La Liga, Serie A, Bundesliga hay các giải đấu khu vực và trong nước như V-League, AFF Cup. Bên cạnh đó, CakhiaTV còn cập nhật nhiều giải hạng dưới, giao hữu quốc tế và các trận đấu ít được phát sóng trên truyền hình.
Với kho nội dung phong phú trải dài khắp 5 châu lục, CakhiaTV tối ưu link xem theo từng trận đấu, giúp người dùng tiếp cận nhanh chóng từ những trận cầu tâm điểm đến các cuộc đối đầu ít phổ biến nhưng không kém phần hấp dẫn.
Đỉnh cao cấp Câu lạc bộ: Nơi các siêu sao “flex” kỹ năng
Tại Cakhia TV, bóng đá cấp CLB là sự hội tụ của công nghệ streaming 4K và dàn BLV “mặn mòi”. Bạn sẽ được trải nghiệm trọn vẹn:
- Big Five châu Âu: Toàn bộ lịch trình Ngoại hạng Anh (Premier League), La Liga (Tây Ban Nha), Serie A (Ý), Bundesliga (Đức) và Ligue 1 (Pháp). Không chỉ có Big 6, chúng tôi phát sóng cả những trận cầu trụ hạng đầy kịch tính.
- Cúp Châu Âu danh giá: UEFA Champions League (C1), Europa League (C2) và Conference League (C3). Mọi pha “check VAR” hay những tình huống lật kèo kinh điển đều được CakhiaTV truyền tải với độ trễ gần như bằng không.
- Kỷ nguyên mới bóng đá liên lục địa: Theo dõi Messi “gánh team” tại MLS hay Ronaldo “out trình” tại Saudi Pro League. Dù trái múi giờ, Xem Bóng Đá CakhiaTV vẫn đảm bảo đường truyền VIP ổn định nhất.
Rực lửa cấp Đội tuyển Quốc gia: Niềm tự hào màu cờ sắc áo
Mỗi trận đấu quốc tế là một sự kiện văn hóa. CakhiaTV cung cấp hạ tầng chịu tải lớn cho các giải đấu:
- Đấu trường toàn cầu: World Cup, Euro, Copa America và Nations League. Đây là những thời điểm hệ thống bóng đá trực tiếp của chúng tôi vận hành công suất tối đa để phục vụ hàng chục triệu người xem cùng lúc.
- Bóng đá châu Á: Asian Cup, vòng loại World Cup khu vực châu Á và đặc biệt là các trận đấu có sự góp mặt của các đội bóng lớn như Nhật Bản, Hàn Quốc, Saudi Arabia.
Bóng đá Việt Nam: Hơi thở sân cỏ nội và niềm tin quốc gia

Chúng tôi ưu tiên tối đa cho các giải đấu quốc nội, giúp fan Việt dễ dàng tiếp cận Trực Tiếp Bóng Đá Cà Khịa với sự am hiểu sâu sắc về bóng đá nước nhà:
- Hệ thống giải chuyên nghiệp: V-League 1, V-League 2 (Giải hạng Nhất) và Cúp Quốc gia. Mọi diễn biến từ các sân vận động Thiên Trường, Hàng Đẫy đến Pleiku đều được cập nhật từng giây.
- Cấp độ ĐTQG & Giải trẻ: Từ các trận giao hữu quốc tế của ĐTQG Việt Nam đến các giải AFF Cup, SEA Games, U19, U23 châu Á. Đặc biệt, chúng tôi phát sóng đầy đủ các trận đấu ĐT Nữ Việt Nam, tôn vinh những cô gái vàng thể thao nước nhà.
Giải đấu “ngách” và bóng đá cỏ
Điểm làm nên sự khác biệt về Information Density Cà Khịa TV chính là khả năng quét link “vô đối”:
- Bóng đá Nam Mỹ & Nam Á: Giải vô địch quốc gia Brazil (Serie A Brazil), Argentina, Thai-League, K-League, J-League.
- Bóng đá hạng dưới: Những trận đấu ở giải hạng 2 Anh (Championship), hạng 2 Đức, hay thậm chí là các giải đấu giao hữu cấp CLB (Friendly matches).
Chỉ cần sân vận động có tín hiệu vệ tinh, CakhiaTV chắc chắn có link xem trực tiếp bóng đá cho bạn. Chúng tôi xóa bỏ định kiến “giải nhỏ không có người xem”, mang lại sự công bằng cho mọi đam mê của fan túc cầu.
FAQ – Câu Hỏi Thường Gặp Khi Xem Bóng Đá Trên CakhiaTV
1. Xem bóng đá trên CakhiaTV có cần đăng ký tài khoản không?
Không bắt buộc. Bạn có thể truy cập và xem trực tiếp hoàn toàn miễn phí. Tuy nhiên, khi đăng ký thành viên, bạn sẽ có dấu xác nhận trong khung chat, dễ dàng bình luận và giao lưu cùng cộng đồng.
2. Xem CakhiaTV có mất phí không?
CakhiaTV cung cấp link xem bóng đá miễn phí. Người dùng chỉ cần thiết bị có kết nối internet như điện thoại, laptop hoặc Smart TV là có thể theo dõi trận đấu.
3. Vì sao link xem đôi khi chậm hơn tivi?
Độ trễ 10–30 giây là đặc điểm chung của nền tảng phát trực tuyến do quá trình mã hóa và truyền tải tín hiệu qua internet. CakhiaTV đã tối ưu hệ thống để hạn chế độ trễ ở mức thấp nhất.
4. Làm sao để khắc phục tình trạng giật, lag?
Bạn có thể đổi sang link dự phòng, giảm chất lượng hình ảnh xuống 720p/480p, kiểm tra lại Wifi hoặc 4G/5G và tắt bớt ứng dụng chạy nền để cải thiện tốc độ.
5. CakhiaTV phát sóng những giải đấu nào?
Trang web cập nhật đa dạng các giải đấu lớn nhỏ như Ngoại Hạng Anh, Champions League, La Liga, Serie A, Bundesliga, V-League và nhiều giải quốc tế khác.
6. Có thể xem lại trận đấu đã phát sóng không?
Một số trận đấu nổi bật có thể được cập nhật highlight hoặc video xem lại. Bạn nên theo dõi chuyên mục tin tức hoặc highlight để không bỏ lỡ khoảnh khắc quan trọng.
7. CakhiaTV có hỗ trợ xem trên điện thoại không?
Có. Website được tối ưu giao diện cho cả điện thoại, máy tính bảng và máy tính để bàn, giúp người dùng dễ dàng truy cập mọi lúc, mọi nơi.
8. Khi link chính bị lỗi phải làm gì?
Trong trường hợp link chính quá tải hoặc gặp sự cố, bạn chỉ cần chuyển sang các link dự phòng được cung cấp ngay bên dưới trận đấu để tiếp tục theo dõi.
9. CakhiaTV có cập nhật lịch thi đấu và kết quả không?
Có. Trang web thường xuyên cập nhật lịch thi đấu, bảng xếp hạng và kết quả các trận đấu để người hâm mộ tiện theo dõi và tra cứu.
10. Bình luận viên trên CakhiaTV có gì đặc biệt?
CakhiaTV được nhiều người yêu thích nhờ phong cách bình luận trẻ trung, hài hước và gần gũi, tạo nên không khí sôi động, khác biệt so với các kênh truyền thống.
11. Xem bóng đá trên CakhiaTV có an toàn không?
Người dùng nên truy cập đúng địa chỉ website chính thức để đảm bảo an toàn. Đồng thời, hạn chế nhấp vào các quảng cáo lạ hoặc đường link không rõ nguồn gốc.
12. Vì sao đôi lúc website không truy cập được?
Nguyên nhân có thể do bảo trì hệ thống, quá tải lượng truy cập hoặc vấn đề từ nhà mạng. Trong trường hợp này, bạn có thể thử tải lại trang hoặc truy cập lại sau vài phút.

Liên hệ với CakhiaTV bằng những cách nào?
Chúng tôi luôn lắng nghe và phản hồi mọi ý kiến đóng góp của bạn 24/7 qua các kênh chính thức sau:
- Địa chỉ: 109 Đ. TA 21, Khu Phố 4, Quận 12, Thành phố Hồ Chí Minh, Việt Nam. Đây là trụ sở chính, nơi “phát hỏa” ra những buổi bình luận đi vào lòng người.
- CEO/Co-founder: Nguyễn Minh Nhất – Người luôn sẵn sàng đối thoại cùng cộng đồng fan.
- Website: https://csspl.us/ (Cập nhật link mới nhất mỗi ngày).
- Phone: +84851233211 (Hỗ trợ kỹ thuật và hợp tác quảng cáo).
- Email: [email protected] (Mọi khiếu nại hoặc góp ý nội dung vui lòng gửi về đây).
Kết luận
CakhiaTV thực sự là kênh bóng đá đáng tin cậy, nơi bạn có thể thỏa sức theo dõi trực tiếp, cập nhật tin tức, soi kèo mà không tốn kém. Với ưu điểm vượt trội, nội dung chất lượng, đây là điểm đến lý tưởng cho mọi fan hâm mộ. Chúc bạn có những khoảnh khắc vui vẻ với môn thể thao vua, đội bóng yêu thích luôn giành chiến thắng vẻ vang!
bài viết mới

Aston Villa Vô Địch Europa League, EPL Có 6 Suất C1
Aston Villa đã tạo nên một trong những cột mốc đáng nhớ nhất lịch sử [...]
Th5

CLB Freiburg: Sẵn sàng tạo bất ngờ trước đại diện nước Anh
CLB Freiburg đang là một trong những đội bóng đáng chú ý nhất Bundesliga mùa [...]
Th5
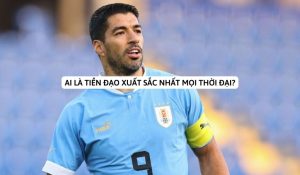
Ai là tiền đạo xuất sắc nhất mọi thời đại trong lịch sử bóng đá?
Trong thế giới bóng đá, có những câu hỏi dường như sẽ không bao giờ [...]
Th5

Sevilla Bứt Phá Mạnh Mẽ Dưới Thời HLV Garcia Pimienta
Sau nhiều mùa giải biến động, Sevilla đang từng bước tìm lại sự ổn định [...]
Th5

Chelsea Vs Manchester City: Bước Nhảy Quan Trọng Trong Giải Đấu!
Chelsea vs Manchester City sẽ là trận đấu đỉnh cao của mùa giải khi hai [...]
Th5

Xem Trực Tiếp Bóng Đá Việt Nam Ở Đâu? Link Xem Bóng Đá Việt Nam
Với người hâm mộ bóng đá nước nhà, những trận đấu của Đội tuyển Quốc [...]
Th5

Manchester City vs Crystal Palace: Nơi Những Ngôi Sao Tỏa Sáng!
Manchester City vs Crystal Palace sẽ diễn ra vào lúc 02:00 ngày 14/05/2026 trong khuôn [...]
Th5

Tottenham Hotspur vs Leeds United: Cuộc Chiến Trên Sân Tottenham Hotspur Stadium!
Tottenham Hotspur vs Leeds United là cuộc chạm trán then chốt ở vòng 36 Ngoại [...]
Th5